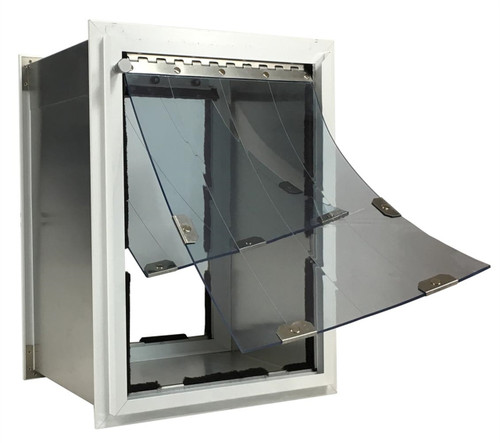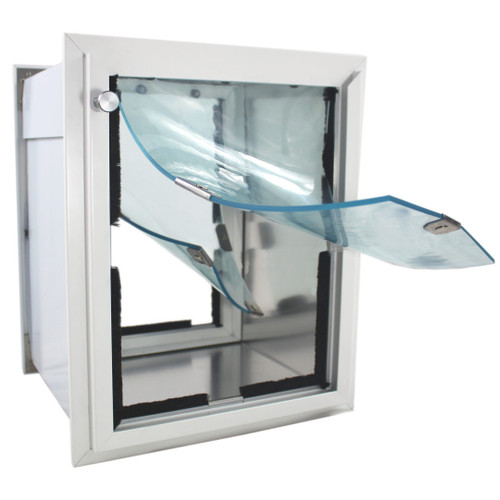


MaxSeal Custom Made Pet Doors - For Walls
The Best Pet Doors by Design
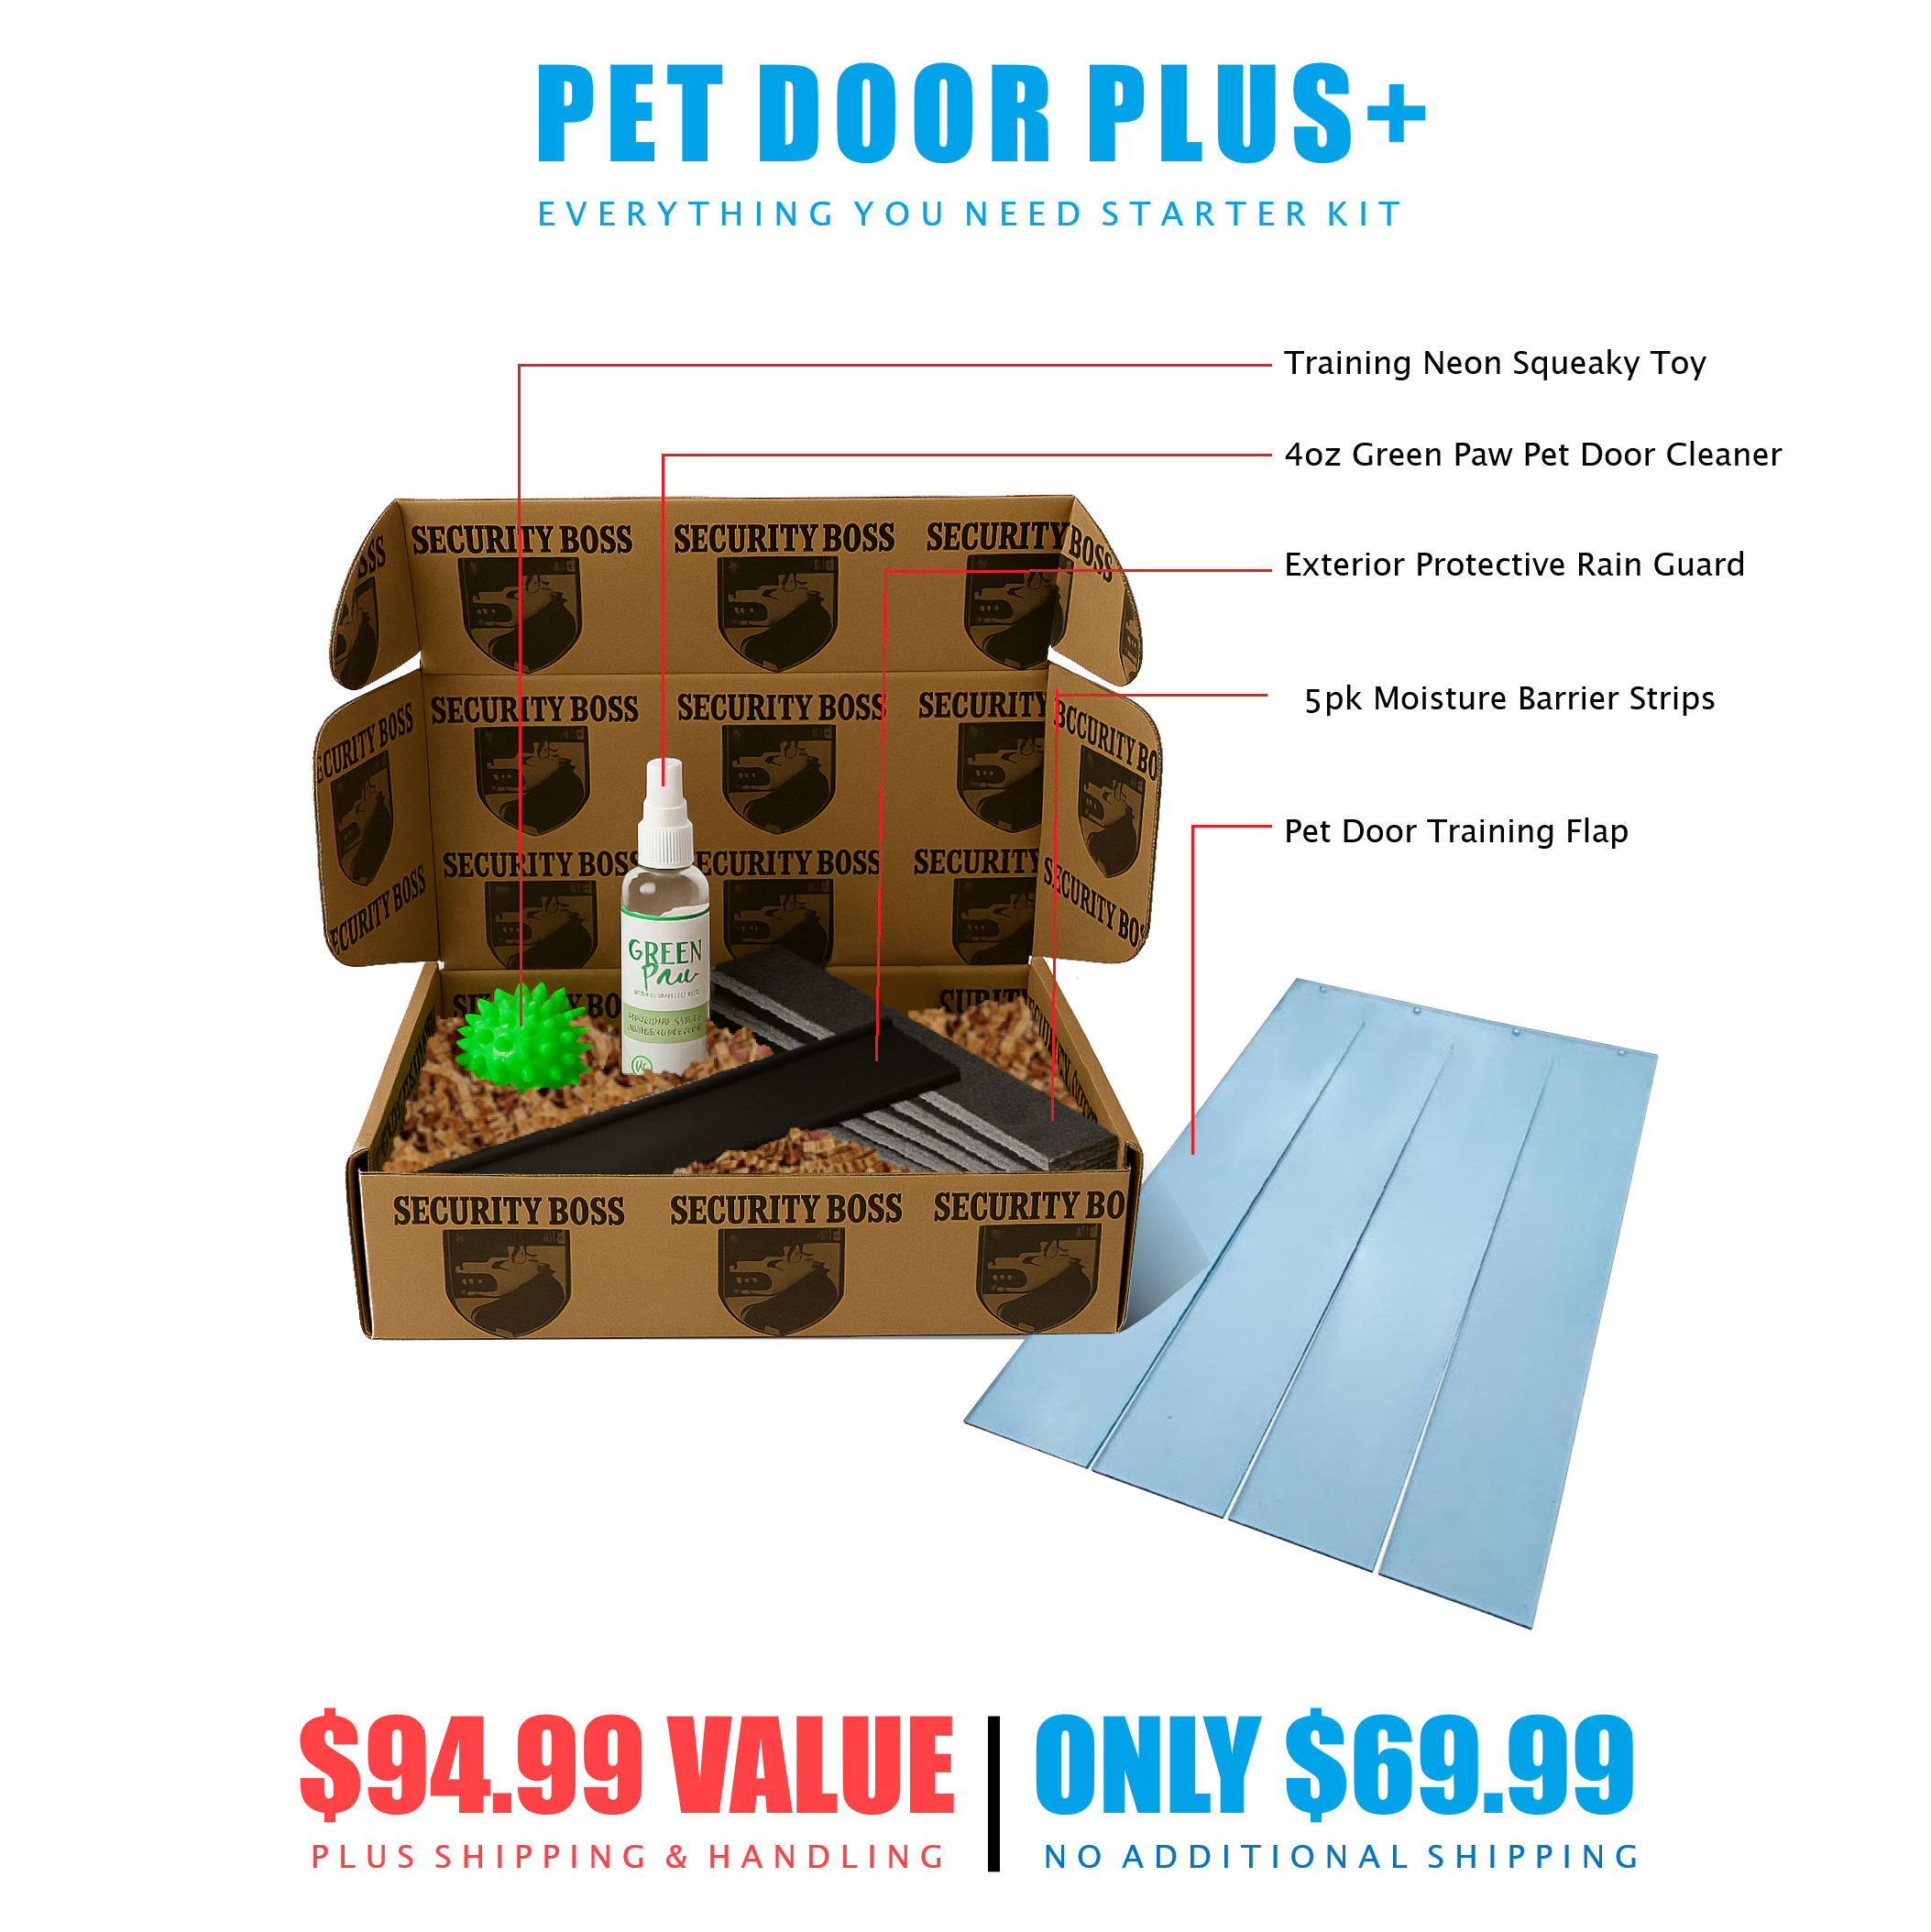
WHATS A PLUS+ STARTER KIT?
Any pet door listed with PLUS+ means that it includes everything needed in a New Pet Door Starter Kit. Rather than have to go find these necessary items individually we have bundled it as one comprehensive product. SAVE BIG when ordering bundled vs order after the fact and paying additional shipping. NO ADDITIONAL SHIPPING on this PLUS+ Bundle!
Best Sealing - Best Insulating - Most Secure
Flaps are impact tested in conditions of -20 degrees Fahrenheit. Moore Pet has tested these doors in the harsh Minnesota winters and summers, we highly recommend this door.
| Important Note: When having a door made to a rough cut opening in a wall; it is recommended that your hole in the wall is a minimum of 1/8' larger than the rough cut dimension chosen for the custom door. |


Example 1: If the hole you are installing a pet door is 15" wide x 20" high, then you multiply 15x20=300 square inches. Look in the chart below to see what range 300 falls into for pricing. Important: your flap size will be 13"w x 18"h (there is a difference of 2" in width and height from rough-cut dimension to flap size).
Example 2: If you want a flap size of 15"wide x 20"high, then you would figure the rough-cut to be 17"w x 22" (minus 2" from each measurement because of the 2" difference between rough-cut and flap size). 17 x 22=374 square inches. Find 374 in the chart below for pricing.
Pricing for these custom doors is based on Rough Cut Dimensions
(width x height of your opening = Total sq. inches in chart below)
MaxSeal Custom Made Doors
|
|||
|
|
|||





| Rough Cut Dimensions Square Inch Range (For pricing) Multiply width x height) |
Single Flap Door Mount |
Dual Flap Door Mount |
| 0-69" | 273.13 | 301.70 |
| 69-93" | 307.35 |
346.90
|
| 93-141" | 374.02 | 413.57 |
| 141-175" | 407.92 | 464.42 |
| 175-215" | 464.42 | 520.92 |
| 215-257" | 502.84 |
559.34
|
| 257-309 | 553.69 | 621.49 |
| 309-350" | 621.49 | 677.99 |
| 350-372" | 683.64 | 757.09 |
| 372-527" | 734.49 | 836.19 |
| 527-600" | 781.95 | 866.70 |
|
MaxSeal
Custom Made Pet Doors  |
||||
|
|
||||
|
Custom pet doors can be made to fit an existing cut through a wall or
or to a certain flap size. Note: The flap size will always be approx. 2" less in width and height than the rough cut "hole" dimension. See calculator above for exact measurements |
||||
|
Pricing is determined by the size of the cut through the wall or door; |
||||
 |
||||
|
We also offer doors that are LARGER than shown on the above chart; please call us at 1-800-829-7876 for assistance.
Custom Doors require 5-7 business days for fabrication then ships via FedEx. If you need a door in a specific time frame, please call us.
|
||||
|
A specification / data sheet will be kept on file for reference with Moore Pet Supplies LLC & Security Boss Manufacturing LLC for any future replacement parts that may need to be ordered.
|
||||
We suggest that when pre-cutting the rough for any pet door, that you add at least an 1/8" to the width and height to allow for easy fitting. Some Rough cuts are more precise and may fit tighter if the hole is not completely true.We always recommend that the door is on hand prior to cutting. We will not be responsible for re-fitting after the fact.

Best Insulating & Sealing, Most Secure
Custom Made Sizes
Replace Existing Doors
Walls: 2" - 10"
$241.71 - $766.99


Pricing starts at:$241.71
Complete pricing chart at bottom of this page

INSTALLATION INSTRUCTIONS
WALL MODEL
Congratulations on your purchase of a MaxSeal Door by Security Boss. The following is a step by step guide for installing your MaxSeal product.
Custom Wall
A SAFETY REMINDER!
Always wear eye protection and gloves when appropriate.
Tools You May Need:
Pliers
Flat tipped screw driver
Scissors or snips
Utility knife
Silicone Sealant
Step 1: Be sure that you have ordered the correct size door for your pet. For long term use it is best to size the pet door so that the top of the door is about 2 inches taller than your pet's shoulders. The resulting bottom of the opening should be a comfortable step over height.
Step 2: Check the package you received to make sure that it contains all the necessary parts.
Complete Kit includes:
Instructions
MaxSeal wall model (includes inner frame with attached tunnel and outer frame)
Indoor Outdoor carpet
Insulated Security Panel with replacement rivets
1-1/4 inch #6 Phillips Head Screws
1-1/4 inch #6 Security Screws for Tamper proof installations
7/64 inch drill bit
Allen Wrench
Tools You May Need:
Tools you may need: (will vary depending on the type of wall where you install the pet door)
Circular saw with wood or masonry blade
Drywall saw or jigsaw
Electric drill
5/16 inch masonry bit (if installing in concrete)
level
Masking tape
Caulk
Tin snips
Stud finder
Tape Measure
Philips head screw driver
Standard head screw driver (for Security Screws)
Step 3: Find a suitable area for your wall model. Wall models have an Insulated security panel that lift out vertically (side loaded panel models are available as needed). Make sure there is enough room to remove this Panel. To install in a framed wall, place the door between studs. Mark the stud locations and position the door between the studs. Check both sides of the wall to make sure the area you cut is free of wiring and plumbing.
Step 4: Position the MaxSeal tunnel against the interior wall. Trace the perimeter of the tunnel upon the wall. Check the dimension of the wall marking against the measurements of the tunnel. Make sure your opening is square and level.
(We recommend that you use the rough-cut information below as sometimes the outer perimeter of the tunnel can vary. You may also make a template with the rough-cut information for your size pet door, then trace from the template on the wall).
Step 5: Cut a small hole near the center of the traced outline in step 4. Look for obstructions within the wall. The smaller the opening the easier the repair should obstructions be found. Use your hand to feel for any obstructions that may not have been seen.
Step 6: If there are no obstructions then cut the inside wall on the lines traced in step 4. Use a drywall saw or utility knife. Once the interior lines have been completely cut, remove the drywall and insulation from the opening.
Step 7: At each corner of the cutout, use a long drill bit to drill through the exterior fascia. Use a Masonry bit for stucco or stone exterior construction.
Step 8: On the exterior wall, find the corner holes you drilled in Step 7 and draw your tunnel outline on the wall. Make sure your opening is square and level.
Step 9: Drill two additional holes at each corner that are on the tunnel outline. Elongate these holes so you can insert a reciprocating saw blade.
Step 10: Use a reciprocating saw to complete the exterior cutout of the opening.
Step 11: Place the inside frame with attached tunnel through the wall cutout. From the outside, hold the inside frame tight against the wall by reaching through the door opening. Mark the tunnel with a marker along the outside wall.
Step 12: Remove the interior door frame and tunnel from the hole. Cut the tunnel along the marked lines in step 11 with tin snips to make the tunnel fit your wall thickness.
Step 13: Insert the inside frame and tunnel back into the opening. From the exterior, Sleeve the outside frame into the tunnel. Use the supplied drill bit to drill through the pre-drilled holes into the tunnel. Insert supplied screws into the drilled holes. The number of side screws varies with the size of pet door. (Security Boss Manufacturing has included One-Way Security Screws as well as Philips head screws to give customers a Tamper-proof option in their door installation.)
Step 14: Caulk between the outside frame and the outside wall at the top and both sides. DO NOT CAULK AT THE BOTTOM OF THE OUTSIDE FRAME. This will restrict the drainage of moisture from inside the door.
Step 15: Measure the width of the tunnel between the door frames and cut the included carpet to the correct width and length to cover the distance between the door frames. To keep the carpet in place use silicone adhesive. Press the carpet into the bottom of the tunnel first, then attach it to the sides of the tunnel.
Step 16: Use window cleaner and a soft towel to remove any fingerprints from the interior or exterior flaps
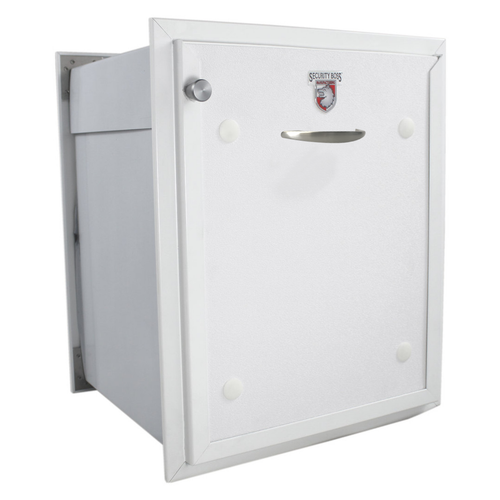
General Use Information: The Insulated Security panel will slide into place and fasten with the dead bolt lock. When removing the Security panel from the unit, apply a slight inward pull to the panel handle while lifting. Since the panel is tight fitting in the channel, this pulling pressure will ensure that the panel rivets do not catch on the frame of the unit.
The dead bolt is retracted by pulling on the handle and turning the handle Clockwise, or Right, approximately a quarter of a turn. To lock the deadbolt, continue to turn the handle of the deadbolt another quarter turn and the lock will extend into the locked position under spring tension. DO NOT TURN THE HANDLE OF THE LOCK COUNTER CLOCK WISE OR LEFT, AS THE LOCK WILL LOOSEN AND NOT WORK.
MAINTENANCE:
Replacement rivets have been included with your hardware kit should the ones on the MaxSeal Insulated Security panel work loose. Install by pressing the two pieces together from opposite sides of the panel in the pre-drilled holes. The Thumbscrews that attach the flaps are factory tightened. Through use, the thumbscrews occasionally loosen and therefore should be checked regularly for tightness. Re-tighten the thumbscrews using the included Allen wrench.
The magnets on all MaxSeal doors are adjustable. This allows a precise seal no matter the weather or size of the flap throughout the years. The magnets are positioned in the frame with a pressure fit. The Magnet is held by an aluminum carrier that can slide in and out of the painted frame rail. The best way to lift the magnet is by using pliers to lift the magnet out of the frame rail. BE SURE TO COVER THE MAGNET AND CARRIER WITH A TOWEL TO PREVENT SCRATCHING OF THE FRAME AND CARRIER. Only lift the magnet the minimum required to make the magnet touch the strike plate on the flap. If the Magnet Carrier becomes loose within the frame after adjustment, simply pry the two legs of the magnet apart and reinsert into the frame rail. The magnets are adjusted correctly when there is no airspace between the magnet and the strike plate. Once the magnets are positioned properly, your replacement flaps is installed.
DISCLAIMER:
Child Safety:
Security Boss Manufacturing, LLC., recommends that households with small children need to exercise proper judgment with leaving their children unattended in any area with a pet door. Pet Doors come with locking panels and locking devices, using these devices minimizes any risk, but does not replace proper parental supervision.
Installation:
We recommend that any consumer that installs their own pet door wear eye protection and be familiar with the construction procedures and tools of installing a pet door.
Magnets:
Virtually all doors use magnets for the activation of the pet door as well as in the sealing of the flaps. Customers with certain medical devices, for example; Pace Maker patients, should consult their physician.
Order to Size or Replace Existing Older Door
Choose Single or Dual Flap version
Dual Flap provides a near perfect weather barrier
43 Reviews Hide Reviews Show Reviews
-
So glad I found this dog door
I had a hole in my wall from a few years ago before my dog died. I just patched the hole up until I was ready for another dog. This door was custom made to fit that exact hole size I had and I can't believe how well it seals. Overall it has been a great experience with the dog door and this company! I strongly recommend both Moorepet and the Maxseal!
-
Nothing Better!
I bought and returned THREE doors before I found this product! I cut the hole in my wall for the other sizes that I just didn't like- they felt cheap and didn't look like they would seal well. I didn't want to make any more cuts so custom made was the way to go and not only did it sleeve perfectly into the opening but the insulation is immaculate!!!!!!!!!!! This is my last dog door purchase which makes me happy!!!!
-
NICE DOOR
I ABSOLUTELY HATED MY OLD DOGGIE DOOR! I FOUND THIS WEBSITE AND THIS CUSTOM DOOR AND WOW THE DIFFERENCE BETWEEN MY OLD DOOR AND THIS DOOR IS UNBELIEVABLE! THANKS
-
So pleased with my purchase!
I needed a unique pet opening size for my fat dog. The door almost had to be as wide as it was tall! This was a perfect solution especially living in Wisconsin I needed a door that was well insulated. This was a great purchasing experience and I strongly recommend this door and company to anyone looking for a quality pet door.
-
Well insulated!
I was sick of my old pet door letting air in so I wanted to replace it. I would have had to make the rough cut larger or frame it in and didn't want to do that so I found this custom door. The door seals so well and sleeved perfectly into my opening! Great service by all representatives I spoke to and I would recommend this company and pet door to anyone! Thanks for such a great experience!
-
WOW!!!!!!!!!!!!!!
I can't say enough good things about this custom Maxseal. The seal, the quality, the security and the ease of installation is top notch. I had a confined area the overall frame had to fit in so I called moorepet and spoke to a friendly rep who guided me through all of the information I needed. The whole experience has been great and way above my expectations! Thanks again for everything!
-
A ruff situation made easy!
We had a large hole in our wall left over from a previous owner's pet door, and we could not find a pet door on the market to fit it. After setting up a temporary fix, we quickly realized our heating and cooling costs were skyrocketing! Enter, the MaxSeal Custom Dual Flap. The folks at Moorepet made it easy! The custom made dog door fit perfectly into our rough opening. No more high bills! I had a bad case of sticker shock initially, but the price is definitely worth it. I would pay another $500 for this door for all the problems it has solved.
-
Cold Draft No More!
This door has been a great way for us to replace our low quality plastic door and still let our pet out. He is as happy as ever and so are we. Not to mention the signifigant drop in energy costs. Thanks!
-
Great for Rain protection
We get a LOT of rain here and this door has been great at keeping the weather outside. I could not be more pleased and I recommend this door all the time.